Hello,
This thread is to document the build of my NP300 over the course of my ownership. I'll put up everything I do to the car here, in the hope that it may be interesting or helpful to others. I always welcome feedback, good or bad, if you think there's a better way to do something.
My build is what Australians call a tourer - that is, outright off road ability is less important than durability over outback roads, the ability to operate in the bush for a week or two at a time without support, and of course to take my family around this beautiful country of mine in safety and comfort.
This car replaces my 2011 GU Patrol. It will be used for a mix of tent-based camping and also to pull a camper trailer (yet to be purchased) in the 750kg-1000kg class.
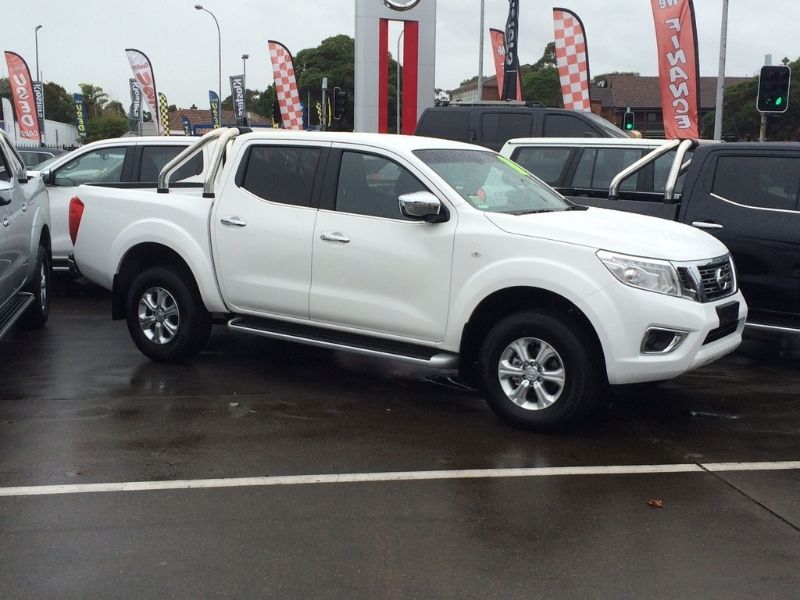
Here's the car the day I bought it:
![Image]()
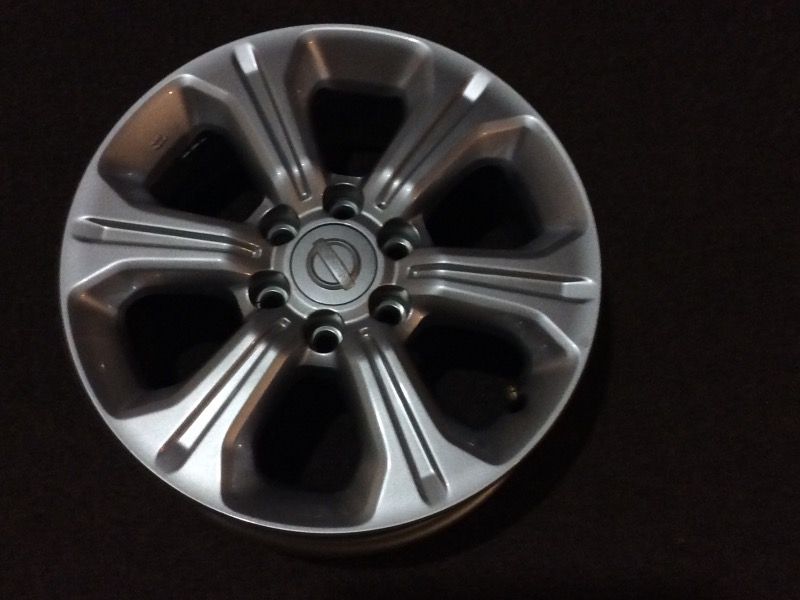
The first thing I bought for it was another wheel - for desert trips, I want two spares. I'll put a tyre on this and carry it in the tray or on a roof rack:
![Image]()
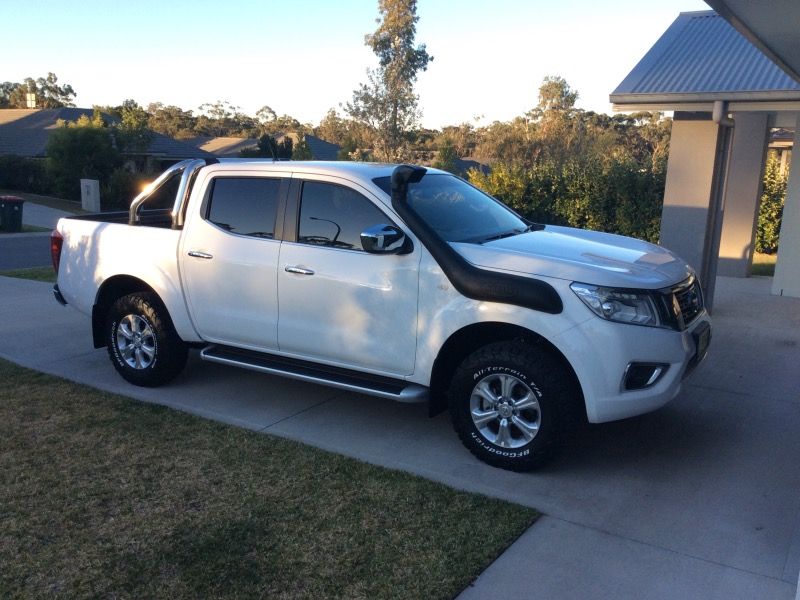
A month or so later, here it is after delivery yesterday. First job was a Safari snorkel, Nissan tow pack, Nissan tub liner, and tinted the front windows (this model has tinted rear windows from the factory). There's also six BFG AT KO2 tyres - one is in my shed waiting to be fitted to that sixth wheel. These were all done by the dealer and are therefore covered under the factory warranty:
![Image]()
I also connected my ScanGauge but it's difficult to photograph and the info it provides is a bit disappointing compared to the Patrol. I'll keep playing with that.
This thread is to document the build of my NP300 over the course of my ownership. I'll put up everything I do to the car here, in the hope that it may be interesting or helpful to others. I always welcome feedback, good or bad, if you think there's a better way to do something.
My build is what Australians call a tourer - that is, outright off road ability is less important than durability over outback roads, the ability to operate in the bush for a week or two at a time without support, and of course to take my family around this beautiful country of mine in safety and comfort.
This car replaces my 2011 GU Patrol. It will be used for a mix of tent-based camping and also to pull a camper trailer (yet to be purchased) in the 750kg-1000kg class.
Here's the car the day I bought it:
The first thing I bought for it was another wheel - for desert trips, I want two spares. I'll put a tyre on this and carry it in the tray or on a roof rack:
A month or so later, here it is after delivery yesterday. First job was a Safari snorkel, Nissan tow pack, Nissan tub liner, and tinted the front windows (this model has tinted rear windows from the factory). There's also six BFG AT KO2 tyres - one is in my shed waiting to be fitted to that sixth wheel. These were all done by the dealer and are therefore covered under the factory warranty:
I also connected my ScanGauge but it's difficult to photograph and the info it provides is a bit disappointing compared to the Patrol. I'll keep playing with that.


")